Saturday, October 10, 2009

Sardine Rolls

- z.

My loaf of multigrain is going to expire tomorrow. I hate not finishing my bread so I decided to have it for lunch today, and since I've never made sardine rolls my whole life, I figured this should be a good chance.

So yeah, easy peasy recipe, inspired by my friend Iqa who makes awesome sardine rolls.

1. Prepare filling: I used
- 1 can sardine (in soya bean oil),
- 1 packet tomato paste,
- 1tsp crushed garlic,
- 1tbsp prawn sambal,
- 1/2 big onion,
- 1 vegetable cubestock.

Thus:
Sardine Roll : Filling

2. Prepare coating: I used 2 eggs & sprinkles of parsley (whisked lightly)
Sardine Roll : Coating

3. Get ready with the weapon and ammo: A rolling pin and sliced bread. Keep rollin' them bread to get 'em as flat you can, yo.
Sardine Roll : Miscellaneous stuff

4. Place the filling (1) inside the flattened bread (3), roll it up tight, and coat it with the egg mixture (2). If the bread keeps unrolling itself, secure with a toothpick as I did. Then, place it in heated oil (light/medium fry) slowly. Repeat till these prepared rolls fill up the pan/wok:
Sardine Roll : Cooking!

5. End result:
Sardine Roll : Done!

This uses about 9 slices of bread, and the quantity of eggs used may be less/more, so if you want to use a whole loaf, use 3 eggs instead.

This is ridiculously filling, possibly because of all that oil XD.

Have fun~

Wednesday, October 07, 2009

Quiches!

- z.

So there I was salivating while reading/viewing some food blogs where suddenly, upon cruising through some of their archives, an entry about quiche loaded before my eyes. It was then that I realised that I should probably start making some... before I lose too much liquid from my body. :P

And THUS, the search for easy-to-make Quiche recipes began!

I learnt that there were two ways of making quiche : one where you make the crust and contents separately, and the other where you just pretty much mix the whole thing up. Laziness would dictate that I do the latter, but seeing that I was out of self-raising flour which that one requires, I did the first one, which wasn't too bad to begin with. Later I saw a friend and got some self-raising flour from her, so I did the second recipe as well because I had way too much 'filling'. Much later, I used the excess of that (I told you I made way too much :P) for some pasta.


So let's make some Quiche already!


Quiche #1

The quintessential quiche, for me, is one that uses sour cream or 50% cream 50% milk.
...but to put it simply, I used neither in this first recipe...because I forgot, lol. So this is practically like an egg tart. A very savoury egg tart.

Next time I make these (which will probably be aaaaaaaaages away because they're so unhealthy with all that cheese and eggs, lol) I will :
  • add cream (duh)
  • add spinach (because I'm dumb and forgetful D:)
  • add tomatoes (because I forgot again D: D: D:)
  • make the crusts thinner :D
  • use cheddar cheese 

Anyway, Here's the recipe I used for this one: ( My comments/alterations are in red. :) )
  • Crust (recipe suggested by Afdzal, thank you!!) : from Recipezaar.
    • Ingredients
      • 1 cup flour
      • ½ teaspoon salt
      • ¼ cup olive oil or canola oil - I used soya bean oil
      • ¼ cup cold water - refrigerated is good

    • Directions
      • Mix flour and salt with fork. 
      • Beat oil and water with whisk or fork to thicken.
      • Pour into flour and mix with fork ~ I think it's perhaps easier to use my hands, so I did. However, if you do this, don't knead too much, and make sure to put it in the fridge for a few minutes.
      • Press into 9" pie crust ~ I used a muffin tray, it works just as well

  • Filling (found at Suite101)
    • Ingredients:
      • 1 cup shredded cheese ~ I used vegetarian edam. It tastes kinda funny before it's cooked, but the aftertaste pretty much disappears after it's cooked. It's also quite creamy, so it's got a nice texture to it after the quiche is done. 
      • 1-1½ cups of whatever ~ I used:
        • 1tbsp of finely chopped garlic
        • 1tsp of ginger
        • 2 cups meat:
          • minced chicken (2 burger patties, mashed, actually =_=)
          • 1 chopped chicken sausage 
            • I realise that these processed meat products aren't as good as real lean meat, and aren't exactly healthy/conventional lol, but they're practical items to have around the kitchen.
        • 1 big white onion
        • 1 carrot
        • 1 capsicum,
        • ¼ cauliflower
        • Salt to taste
        • Blackpepper
        • A pinch of oregano, basil, parsley 
      • 4 eggs
      • 2 cups heavy cream or half & half with milk ~ Didn't add this in x_x 
      • ¾ tsp salt
      • ¼ tsp nutmeg, ground ~ Didn't add this either, because I don't have any. And I think I might be allergic to it, for some reason. I substituted this with some basil, a little bit of oregano and some parsley. Because I kinda predicted that I was gonna screw up anyway since it's my first time, so might as well experiment, lol.

  • Crust + Filling (also from Suite101)
    •  Directions
      • Sprinkle cheese evenly over the bottom of the crust. 
      • Place veggies, meats and other additions on top of the cheese. ~ I separately cooked my filling first till about 75%, because I use meat and I tend to get paranoid about meat not being cooked well :P.
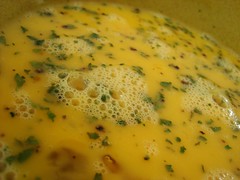
      • Whisk together eggs, cream, salt and nutmeg in a medium size mixing bowl on medium speed.
      • Carefully pour cream on top of veggies, etc. ~ Seriously, do this carefully or everything may spill out of the crusty bit like mine did. -_-
      • Bake at 350degF/approx. 176.6degC for 45 minutes or until knife comes out clean.
      • Let sit for 15 minutes before slicing. ~ Content IS hot when it's fresh from the oven. Or you'll get a burnt tongue *shifty eyes*
      • Refrigerate leftovers.
And the result?

miniquiche
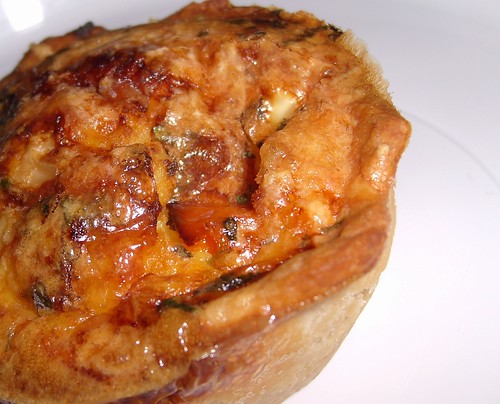
It doesn't taste that bad, I swear. x_x

~
Next, Quiche #2


Note for next time:
  • USE BUTTER! =_= I keep skipping ingredients accidentally, sigh! (I'm terrible at following recipes...)
Recipe taken from Best Recipes. :)
  • Ingredients:
    • 4 eggs ~ Used probably 3 eggs...long story.
    • 1½ cups milk ~ I used 2 cups by accident, sigh...
    • 3 tbsp melted butter ~ I suppose oil would do?
    • ½ cup self-raising flour ~ IMPORTANT! 
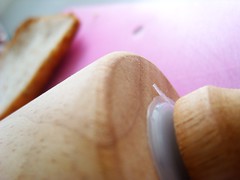
    • 1 cup grated cheese ~ Haha I grated my thumb while doing this =_= - the ingredients were fine tho!
    • 2 cups of whatever ~ See above 'whatever'

  •  Directions: 
    • Set oven to 180degC
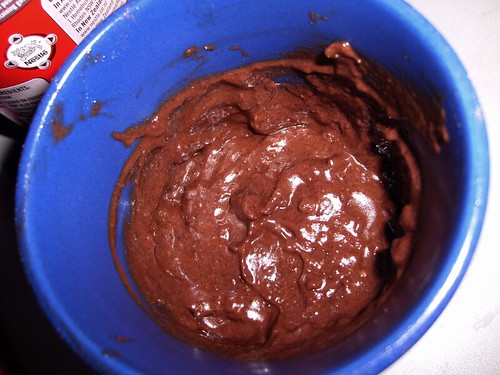
    • Whisk together thesefirst 4 ingredients (eggs, milk, butter, s-r flour)
    • Fold in cheese and filling
    • Pour the mixture above into a quiche pan  ~ I used a normal medium-sized square baking pan ... which is a lot thicker than a normal quiche pan (quiche pans tend to be wide but short).
    • Bake for about 40 minutes ~Wait for about 10-15 minutes before serving
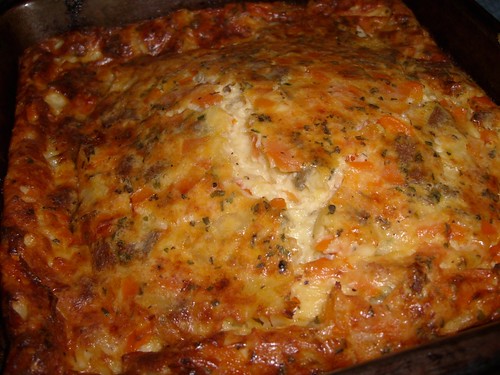
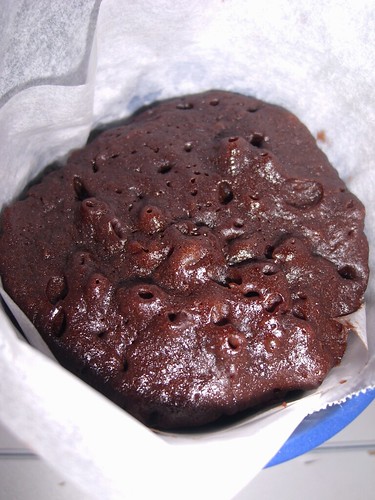
 Et voila:

bigquiche

This was right after I took it out from the oven, so the middle part is kinda bulging out.


To be honest, I prefer the taste of the 2nd quiche to the first, but then... I was silly enough to miss the milk of the 1st one, so I guess it's unfair to compare to begin with. Hehe.

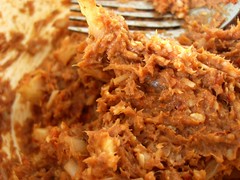
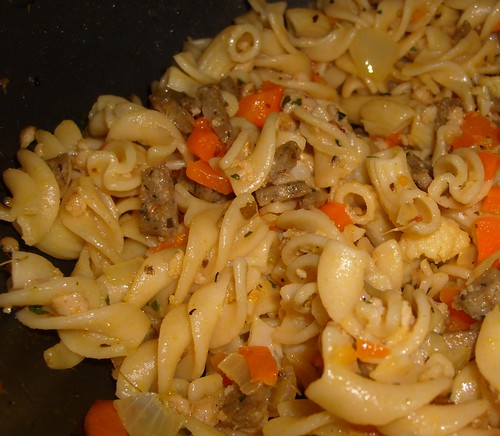
As I've written above, due to the excess filling, I decided to make a pasta dish. Thus:

Pasta!

Chicken, Carrot, Capsicum Pasta

So that's just pasta (leftover elbows and spirals from previous cooking), about 250g, boiled (without the essentials : a tsp each of oil and salt, because, again, I forgot to add until they were done T_T), with other stuff. After sifting out the boiling water, I chucked the pasta into the pot with the extra filling. Then I twirled the whole combo around the pot with medium heat to let it mix. I added some salt, black pepper, oregano too. BecauseomgIloveoreganoomgitisawesome :P

And that's that. End of story, YAY! I can do other things now because this entry's done! :D :D :D

Hope I gave some ideas on how you can venture more in your cooking, or at least improve on. :)

Friday, August 28, 2009

Kuih "Shrek"

- Ateen.

Hello hello!

Wow, when was the last time someone (other blog owners) ever post something into this blog? You guys don't cook anymore ay?
Hahaha.

Anyway, happy Ramadhan Kareem to all. Hope this year will bring us more barakah than the year before and help us to find the true meaning of being a Muslim, insyaAllah.

So today, the recipe that I want to share with you guys is how to make a traditional Malay sweet dish known as "
Kuih Gulung" or some people just called it "Kuih Ketayap" or "Kuih Dadar". Doesn't matter what it's being called, it tastes the same anyway ;p

For those who doesn't know what "Kuih Gulung" is, it looks like spring roll but the filling is made from shredded coconut which being cooked together with brown and white sugar. Meanwhile, the wrapper is made from plain flour and few other ingredients that I will list down here later.

So, go get a pen and piece of paper so that you will be able try to make it for breaking fast today! =)

Ingredients:

For the wrapper

1. Plain flour
2. Egg
3. Fresh milk
4. Green colouring (can also use "
Pandan" leaves but you have to blend and filter to get the green-coloured juice)
5. Vanilla essence
6. Table salt
7. Cooking oil

For the filling

1. Shredded coconut (if you're in Malaysia, it's very easy to find, but for overseas student, you can use dessicated coconut which can easily be found at supermarket)
2. Brown sugar
3. White sugar
4. Plain water

How to make?

The Filling

Put the dessicated coconut into a pan and then add a scoop (means ladle or "
senduk") of sugar and 2 scoops of white sugar. Add some water to mix them together. Cook for about 3-5 minutes.

The wrapper

1. Put 4 cups of plain flour in a round shape and flowers pattern container.
2. Add an egg into the container.
3. Pour a cup of fresh milk.
4. Add a few drops of vanilla essence.
5. Add 1/2 tea spoon of table salt
6. Add 1 tea spoon of cooking oil (optional. this to avoid the wrapper sticks to the frying pan during cooking)
7. Stir all the ingredients until they are completely mixed together.
8.Then, heat a frying pan and put some cooking oil on it just to make sure that the wrapper does not stick on the pan later on.
9. By using a ladle, scoop the mixture about 1/2 full of the ladle. Then put it in the heated frying pan.
10. Try to spread the mixture well and thin by swinging your hip the pan. Wrapper which is too thick will be very hard to be folded and becomes brittle too.
11. Wait until it cooked (you may know by looking at its colour).
12. When cooked, transfer it to a plate for the next step.

Rolling

1. Put the cooked coconut filling onto the wrapper. Try not to put the filling to much because it will coming out of the wrapper when being rolled.
2. Now, you can roll them together according to your own style but make sure to fold both of the right and left sides of the wrapper after you put the filling onto it so that the it won't come out.
3. Done!

Few tips: Start the rolling process as soon as it is taken out from the pan. This ensures the wrapper still soft and sticks together after being rolled. Also, don't forget to wash your hands before you touch the food! Stop the flu y'all! =)


kuih gulung


"Kuih" Shrek ;p

That's all for now!

Keep rolling rolling rolling rolling~~
(Limp Bizkit song ;p)

Thursday, July 23, 2009

Choc cake in a mug

- zaty.

Update 11/5/2014: here's an updated version of the recipe: clickie!

Yes, in a mug. I kid you not.

microwave chocolate mug cake attempt #1 (before)
Pre-microwave

microwave chocolate mug cake attempt #2 (after)
Post-microwave

Not exactly the prettiest cake in the world, but honestly - if you have 10 minutes, a microwave oven, and a dire craving for a choc cake fix pronto, this is much easier than walking all the way to the bakery or even baking a 'real' cake.

Original recipe from here.

Microwave choc cake in a mug recipe:
Tools
  • Microwave & coffee mug. Also baking paper to line the mug :)
Ingredients
  • 4 tbsp flour
  • 4 tbsp sugar
  • 2 tbsp unsweetened cocoa
  • 2 tbsp whisked egg (omit this for a fudgier cake)
  • 3 tbsp milk
  • 3 tbsp oil
  • 3 tbsp choc chips
  • A few tsps of of flavoring - eg. vanilla, peppermint
Directions
  1. Add all of the dry ingredients (flour, sugar, cocoa) to the mug and mix.
  2. Add the egg and combine well. It gets pretty pasty at this point.
  3. Stir in milk and oil.
  4. Add choc chips and flavoring. Stir well.
  5. Microwave for 3 minutes in a 1000w oven, or 4 minutes in a 700w oven. It will start to crown over the top of the mug. Don't panic! It will collapse once the heat stops.

Enjoy :)