Showing posts with label dessert. Show all posts

Sunday, January 18, 2015

Vegetarian mug chocolate cake - 3rd try

- zaty.

This is a modified version of the mug choc cake I tried a few years ago (ori recipe here; my 1st, 2nd attempts). I like experimenting... and i like how this turned out, especially if I'm in dire need of a quick chocolatey treat. The result? Half a mug of choc cake -- just enough to satiate those sudden pangs of sweet goodness.


Equipment 
  • A microwable mug/bowl
  • A tablespoon
  • A microwave 


Ingredients
  • 4 Tb flour
  • 1 Tb white sugar
  • 1 Tb unsweetened cocoa powder 
  • 1 Tb nutella
  • 1 tsp peanut butter (might use more pb next time)
  • 3 Tb water
  • 3 Tb coconut oil
  • 1 Tb vanilla essence


Directions  
  1. Combine dry ingredients (flour, sugar, cocoa) in the mug/bowl.
  2. Add wet ingredients (nutella, peanut butter, water, oil, flavoring), mix well
  3. Place mug in microwave; nuke for 2mins 30secs in a 1000w microwave oven
  4. Take it out of the microwave, let it settle for a few moments, and dig in!

Best eaten fresh out of the microwave when it's still soft and gooey; if you leave it for a while the cake might harden (it's not that bad, it just gets a bit a bit chunky/flaky after that, and I prefer my cakes soft).

You can also sprinkle some icing sugar at the top or have this with vanilla ice cream if you like, because i've reduced the sugar for this version because of the additions (e.g. choc chips/nutella) :)

Enjoy ^___^

Tuesday, December 23, 2014

Chewy apricot banana muesli cookies

- Zaty.

The first and only time I had apricot cookies was many years ago, in NZ (a classmate offered it to me). She said it was vegetarian, which intrigued me, because I thought most baking required eggs. She said eggs can be substituted with bananas for many sweet desserts. Many years later (i.e. now) I have decided to experiment!

I used this as my base recipe. The tweaked recipe (below) has some changes and additions because I didn't have some ingredients and I felt like adding banana and rose flavoring which I had lying around, hihi.


This makes about 40 chewy 2-inch-sized cookies:

Ingredients
  1. 1 cup brown sugar
  2. 3/4 cup margarine, softened (I used 1/2 cup butter, 1/4 cup coconut oil)
  3. 1 medium-sized banana, mashed
  4. 2 tsp vanilla flavoring
  5. 1 tsp rose flavoring
  6. 1 Tbsp water
  7. 1/2 cups muesli with raisins
  8. 3/4 cup white flour
  9. 1 tsp baking soda
  10. 1/4 tsp salt
  11. 1 cup dried apricot, finely chopped
Steps

  1. Preheat oven to 180degC. 
  2. In a large mixing bowl, combine sugar, margarine, banana, flavorings and water. Mix.
  3. Add the rest of the ingredients into the bowl. Mix.
  4. Scoop dough by rounded tablespoons and push with another spoon onto a baking tray lined with baking paper - about 2 inches between them. While waiting in between, place the mixing bowl in the fridge - this will make the cookies slightly crunchier.
  5. Bake for about 8-9 minutes per batch.
  6. After taken out of the oven, place cookies to cool on a tray. They'll be good to munch after a few minutes.

I've offered them to a number of people - my landlady, her hubby, my neighbor, my SO and his sibs... they all love it. I'm very happy with how these turned out :)

Monday, May 12, 2014

Vegan-friendly 5-minute choc cake in a mug

- zaty.


This is a modified version of the mug choc cake I tried a few years ago; this cake is less of a mess to make, uses basic ingredients, is vegan-friendy, and better for those on a diet (fewer calories, less sugar, less fat, smaller portion)! Basically, I omited the egg, substituted the milk with water, and changed the portions of some of the ingredients of the original recipe.

So I've done this a few of times in the past few months, and I like how it turns out, especially if I'm in dire need of a quick chocolatey treat. The result? Half a mug of choc cake -- just enough to satiate those sudden pangs of sweet goodness.

Equipment 
  1. A normal-sized mug
  2. A tablespoon
  3. A microwave 

Ingredients
  1. 4 Tb flour
  2. 1 Tb white sugar
  3. 1 Tb unsweetened cocoa powder 
  4. 3 Tb choc chips
  5. 3 Tb water *
  6. 3 Tb oil **
  7. Some flavoring:
    1. if using liquid eg. vanilla, peppermint essence, 1Tb
    2. if using powder form eg. cinnamon, 1tsp plus 1Tb water
sometimes I add 1 Tb oatmeal powder to give the cake some texture
**  sometimes I mix coconut oil, butter, and/or vegetable oil
Directions  
  1. Place dry ingredients (flour, sugar, cocoa, choc chips) into the mug, mix well.
  2. Add wet ingredients (water, oil, flavoring), mix until well-combined. This might take about a minute.
  3. Place mug in microwave; nuke for 2mins 50sec in a 1000w microwave oven (or 4 mins for 700w). 
  4. Take it out of the microwave, let it settle for a few moments, and dig in!
Best eaten fresh out of the oven when it's still soft and gooey; if you leave it for a while the cake might harden (it's not that bad, it just gets a bit a bit chunky/flaky after that, and I prefer my cakes soft).

You can also sprinkle some icing sugar at the top or have this with vanilla ice cream if you like :)

Enjoy ^___^

Friday, March 04, 2011

Super-easy Yoghurt Cake

- Zaty.

Today's baking is a a result of Carlo's story about his friend's mom who makes yoghurt cake (which is apparently one of the best cakes he's eaten), and a M'sian potluck thing (masquerading as a 'natural disaster' meeting). After much debate on what to bake, I surrendered and googled up 'yoghurt cake', and was pleasantly surprised by how easy the recipe seemed. It really is easy to make, just like how this recipe looks - no electric mixers, melting butters, kneading etc. Easy peasy. Just the way I like it. :P

Anyway, I got the recipe from here, but with a simple adjustment - I used the (150g) cup for single-serve yoghurts as the measuring tool. In other words, every ingredient is measured using this cup (aside from the eggs, of course... although 3 eggs do fill up the yoghurt cup nicely). :)

I made 2 cakes: one with raspberry+cream yoghurt, and the other was peach+cream yoghurt.

Will post up more pics later.
~

This recipe makes a medium-sized cake.

Note: cup* = single-serve yoghurt cup

Ingredients 
  • 1 cup* of yoghurt (fruity flavored is yumm)
  • 1 cup* oil (I used my canola cooking oil)
  • 2 cups* white sugar
  • 3 cups* self-raising flour
  • 3 eggs
    Optional: raspberry (or other) jam.
Directions
  1. Preheat oven to 160degC.
  2. In a bowl, beat the ingredients one-by-one with a wooden spatula until smooth and creamy. This might take a few minutes.
  3. Pour smooth mixture into a greased/baking-paper lined pan. 
    • Optional: Scoop some jam and slowly place it at the top of the batter. Use a chopstick or something long to squiggle or swirl the jam to give the cake extra flavour.
  4. Bake for 1 hour or till golden brown (the fork should come out clean when poked).
  5. Give about 10 mins to cool down, then cut and serve.
    • Optional: After the cake has cooled down a bit, turn the cake out of the pan, and let it stand on its side. Cut the cake in the middle lengthways, and place both sides down. Spread some jam onto the 'fluffy' side of both halves, then enjoin the two parts the way it was before -- it should look like a 'jam sandwich' cake in the end.

Result?


Raspberry+cream yoghurt cake (see the swirley bit at the top? Hee ^_^)
Note: This is before I turned it into a sandwich cake.


I have some extra slices left, so I'll post some pics of what it looks like later.

~

It's so easy to make, and it tastes nice if I do say so myself. Do try it! Have fun baking! :)

Saturday, September 18, 2010

Coco Choco Slice

- Zaty.


Got the recipe from the back of a tin of Pam's evaporated milk. Seriously.

I think I lost the recipe sheet. Darnit. I'll update this when I find it/buy another tin of evaporated milk. :P

Prep time: 20 mins
For: 1 medium-sized pan

Ingredients

Base


  • 1 1/2 C flour
  • 3 T cocoa
  • 2 t baking powder
  • 3/4 C castor/icing sugar
  • 1/2 C dessicated coconut
  • 175g butter, melted
Topping
  • 1 C icing sugar
  • 2 T cocoa
  • 3 T butter, melted
  • 1 C dessicated coconut
  • 4 T sweetened condensed milk
  • 1 t vanilla essence

Instructions
  1. Preheat oven to 180 deg C, then grease/line a 20cmx30cm slice tin.
  2. Prepare base:
    1. Sift flour, cocoa and baking powder into a bowl.
    2. Stir in sugar and coconut.
    3. Add in butter and mix well, to moist crumbs.
    4. Press the crumb base mixture into the prepared tin using a spatula/wooden spoon.
    5. Bake in a preheated oven for 20mins, then allow to cool.
  3. Prepare topping:
    1. Sift icing sugar and cocoa in a bowl.
    2. Stir in melted butter, coconut, condesned milk and vanilla essence. Mix well.
  4. Spread topping over the base and place in fridge for 2 hours (until firm), then cut the pieces.


It was fun to make! :)

Tuesday, August 17, 2010

Sweet Filo Egg Tarts

- zaty.

So I have tonnes of filo pastry sheets... and they're expiring soon. Like, real soon. I needed something easy to make with them, and I needed it like super fast.

Aaaaand so it happens that I stumbled upon some pics of egg tarts today. Yummy, eggy, 'healthy', sweet, smile-erupting egg tarts. All together now, MMMmmmMmmm. :)

I searched high and low for egg tart recipes that happen to use filo, but alas, none was conjured up by Google. This, of course, calls for an experiment by yours truly! :P

So after compiling a few egg tart recipes to find a reasonable/rational experimental recipe (and taking whatever I have in my cupboard into consideration), here's what I managed to come up with:


Sweet Filo Egg Tarts

Makes 18 tarts (using medium-sized cupcake pans).

Ingredients
  • Filo pastry
  • 220ml hot water
  • 80g white sugar
  • 1/4 tsp salt
  • 3 eggs
  • 80ml milk
  • 1/4 tsp vanilla extract
Instructions
  1. Preheat oven at 180 C
  2. Dissolve sugar & salt in hot water. While waiting to cool, continue with #3
  3. Prepare filo:
    • Cut filo into desirable size and layer about 8 of them in each cupcake hole. 
    • Butter the edges of the stacked pastry to avoid them from getting too flaky.
  4. In a bowl, whisk eggs until thick and creamy, then add milk. Continue to whisk until combined.
  5. Add sugar+salt solution gradually and then some vanilla essence. Continue whisking. It will turn quite runny, that's fine.
  6. Scoop the mixture slowly into the prepared filo pastry.
  7. Bake for 20 minutes or till the edges of the filo is brown and the filling is set.
  8. Let cool before serving.

Results?

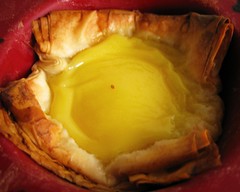
sweet filo egg tart - plain
simple and plain

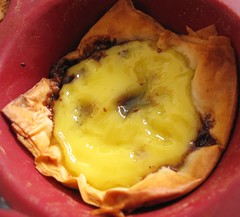
sweet filo egg tart - choc chip
with choc chips
(added last, right before baking)

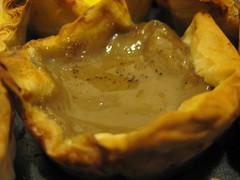
sweet filo egg tart - choc
with powdery choc drink
(added last before baking)

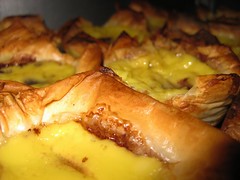
sweet filo egg tart - crust focus
yup, crispy pastry. :)

Haha they're not the prettiest things in the world, but they taste alright.

Good luck and have fun trying them out!

Tuesday, August 10, 2010

Cupcakes!

- zaty.

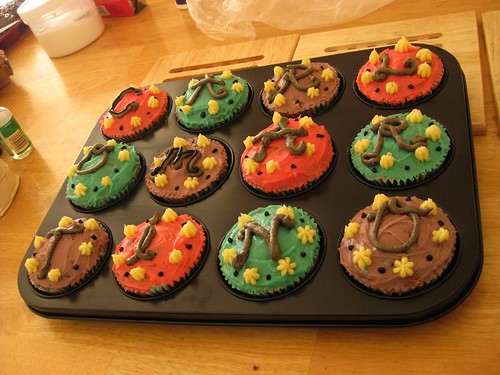
For someone's birthday:


Really easy to make too :D

Here are the recipes for the cupcake (original here) and the icing (original here), in that order:


Needed/recommended tools:
Oven (not microwave), electric beater, cupcake pan, big mixing bowl, measuring spoons/cups.


Easy (vanilla) cupcakes recipe


This simple vanilla cupcake recipe creates a cupcake that is perfect background for your creative decorating ideas.
Ingredients
  • 2 1/4 cups all purpose flour 
  • 1 1/3 cups white sugar
  • 3 teaspoons baking powder
  • 1/2 tsp salt
  • 1/2 cup butter/shortening
  • 1 cup milk
  • 1 tsp vanilla essence (I used 3/4 vanilla, 1/4 peppermint)
  • 2 large eggs
  • Optional: 1 cup of chocolate chips.
Directions
  1. Preheat oven to 175 degrees C and line cupcake pans with paper liners.
  2. Combine: flour, sugar, baking powder, and salt in a large mixing bowl.
  3. Add shortening, milk, and vanilla and beat for 1 minute on medium speed.
  4. Scrape side of bowl with a spatula, add eggs to the mixture and beat for 1 minute on medium speed.
  5. Scrape bowl again and beat on high speed for 1 minute 30 seconds until well mixed. (You may add choc chips and stir it using a spoon after this)
  6. Spoon cupcake batter into paper liners until 1/2 full. (more than this = big cupcake).
  7. Bake for 20 minutes or until toothpick inserted in center comes out clean.
  8. Cool 5 minutes in pans then remove and place on wire racks to cool completely.
  9. Once cupcakes are completely cooled, top with icing (read on).

It's important to make the icing AFTER your cupcakes are done, because if you wait to use the icing, they will harden. And no, heating it up again is  a good idea because it'll melt and turn out very greasy. Really, eww.

The icing is easy to prepare and probably takes about 10 minutes.


Easy buttercream icing recipe
Ingredients
  • 150g butter, softened
  • 250g icing sugar
  • 1 tsp vanilla
  • 2 tsp hot water
  • Food colorings (for the above, I used red and blue liquid coloring)
Directions
  1. Beat together butter and sugar with an electric beater.
  2. Once well combined, add the vanilla and hot water.
  3. Beat again until smooth and creamy. It will be of a light yellow shade, like creamy butter.
  4. Decide how many colors you want and separate this concoction into that number of colors. Then add coloring as needed, little by little.


Note: For the above cupcakes, I used 4 'batches' of colors for the icing:
- yellow (uncolored - as seen as the 'yellow flowers' bordering the cakes),
- hot pink (a few drops of red),
- turquoise (a few drops of blue),
- purple (two shades - one for the base and a darker one for the writing. red+blue)


For the writing, I used combined the leftover icing and added a bit more coloring. I also cheated and used an icing squeeze gel pen I bought sometime ago :P

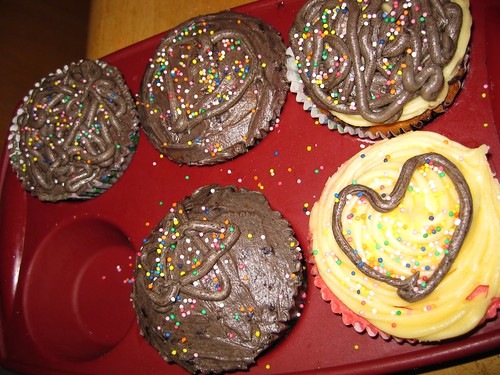
extra cupcakes
The cupcakes that didn't make the cut, topped with all the extra icing and some sprinkles :P


(You can tell I was messing around with everything, eh? Haha)

Have fun! :)

Thursday, July 23, 2009

Choc cake in a mug

- zaty.

Update 11/5/2014: here's an updated version of the recipe: clickie!

Yes, in a mug. I kid you not.

microwave chocolate mug cake attempt #1 (before)
Pre-microwave

microwave chocolate mug cake attempt #2 (after)
Post-microwave

Not exactly the prettiest cake in the world, but honestly - if you have 10 minutes, a microwave oven, and a dire craving for a choc cake fix pronto, this is much easier than walking all the way to the bakery or even baking a 'real' cake.

Original recipe from here.

Microwave choc cake in a mug recipe:
Tools
  • Microwave & coffee mug. Also baking paper to line the mug :)
Ingredients
  • 4 tbsp flour
  • 4 tbsp sugar
  • 2 tbsp unsweetened cocoa
  • 2 tbsp whisked egg (omit this for a fudgier cake)
  • 3 tbsp milk
  • 3 tbsp oil
  • 3 tbsp choc chips
  • A few tsps of of flavoring - eg. vanilla, peppermint
Directions
  1. Add all of the dry ingredients (flour, sugar, cocoa) to the mug and mix.
  2. Add the egg and combine well. It gets pretty pasty at this point.
  3. Stir in milk and oil.
  4. Add choc chips and flavoring. Stir well.
  5. Microwave for 3 minutes in a 1000w oven, or 4 minutes in a 700w oven. It will start to crown over the top of the mug. Don't panic! It will collapse once the heat stops.

Enjoy :)